My AVR experience is based on various editions of Atmel's Studio IDE - so I wanted to find out how to use it with the Arduino hardware, ignoring the Arduino software as much as possible.
Here are the steps I followed to run a simple C program. My starting point was a fresh install of Atmel Studio (version 7.0.783) and the Arduino software (version 1.6.7) on a desktop PC running Windows 10 - and (of course) an Arduino Mega 2560 connected to the PC via USB, with it's green power LED on.
(Note that you can click on an image to see a full size / full resolution version.)
- on the Start Page, select New Project...
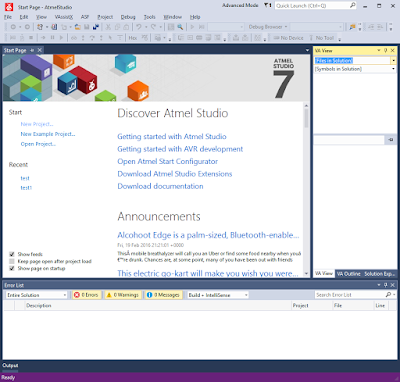
Atmel Studio 7 - Start Page - in the New Project dialog, select GCC C Executable Project, specify a Name and a Location then click OK

Atmel Studio 7 - New Project dialog - in the Device Selection dialog, select ATmega2560 (the type of AVR microcontroller used on the Arduino board) then click OK
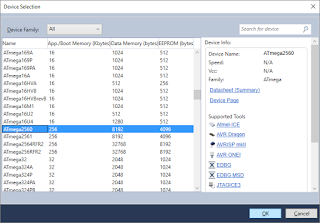
Atmel Studio 7 - Device Selection dialog - a minimal, template project is created, ready for you to enter code...

Atmel Studio 7 - Virgin Project - choose test Properties (assuming your project is called test) from the Project menu, then select Toolchain, and under AVR/GNU C Compiler select Symbols
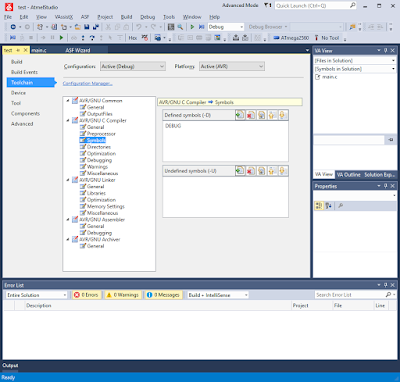
Atmel Studio 7 - Project Properties tab - in the Defined Symbols (-D) box, click the Add Item button and enter F_CPU=16000000UL (this specifies the processor clock frequency in Hertz; for the Arduino Mega 2560 this is 16MHz - the "UL" suffix means Unsigned Long)
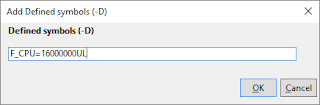
Atmel Studio 7 - adding a defined symbol - select the main.c tab and enter enough C code to see life signs - mine pulses the "L" LED once then twice, over and over

Atmel Studio 7 - entering a simple C test program


#include <avr/io.h>
#include <util/delay.h>

int main(void)
{
 DDRB |= (1 << PORTB7); // PORTB7 direction = out

 while (1)
 {

  // 1 pulse
  PORTB |= (1 << PORTB7); // PORTB7 hi = LED L on
  _delay_ms(500); // 0.5 sec
  PORTB &= ~(1 << PORTB7); // PORTB7 hi = LED L off

  // delay
  _delay_ms(2000); // 2 sec

  // 2 pulses
  PORTB |= (1 << PORTB7);
  _delay_ms(500);
  PORTB &= ~(1 << PORTB7);
  _delay_ms(500);
  PORTB |= (1 << PORTB7);
  _delay_ms(500);
  PORTB &= ~(1 << PORTB7);

  // delay
  _delay_ms(2000);
 }
}
- now the interesting part - adding support for the Arduino's programming mechanism, which requires the use of the avrdude utility that is included in the Arduino software installation
- first, identify the COM port that the Arduino is connected to by running the Device Manger - in my case it was COM3...

Device Manager (Windows 10) showing Arduino COM port - choose External Tools... from the Tools menu
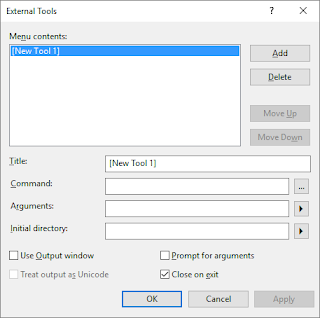
Atmel Studio 7 - External Tools dialog (before) - in the External Tools dialog...
- change the Title to Program
- enter the following in the Command box:
c:\Program Files (x86)\Arduino\hardware\tools\avr\bin\avrdude.exe - enter the following in the Arguments box, changing -P COM3 to match the COM port that the Arduino is connected to on your machine:
-v -C"C:\Program Files (x86)\Arduino\hardware\tools\avr\etc\avrdude.conf" -p atmega2560 -c wiring -P COM3 -b 115200 -D -U flash:w:$(TargetDir)$(TargetName).hex:i - check the Use Output window box
- click OK

Atmel Studio 7 - External Tools dialog (after) - there is now a Program option on the Tools menu which will flash the compiled code into the Arduino board - let's add a corresponding shortcut to the UI:
- select Add or Remove Buttons to the right of No Tool, then Customize...

Atmel Studio 7 - adding a custom button - the Customize dialog appears:

Atmel Studio 7 - Customize dialog - click Add Command...
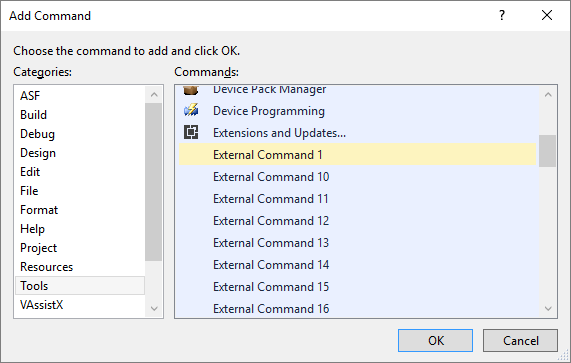
- under Categories select Tools
- under Commands scroll down and select External Command 1
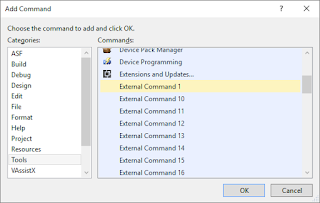
Atmel Studio 7 - Add Command dialog - click OK then Close the Customize dialog
- there is now a Program button left of the device (ATmega2560) button
- to build the code, choose Build Solution from the Build menu (or hit F7):

Atmel Studio 7 - after build - now program the board by clicking the Program button - this will produce some rapid progress messages from the avrdude programming utility in the Output pane:

Atmel Studio 7 - after programming - voila - you should see the "L" LED blinking once then twice, repeatedly